How to Use Free Adobe Acrobat Reader
The steps below will show how you can use the free application of Adobe Acrobat Reader, with no paid subscription needed.
A. How to download free Adobe Acrobat Reader
B. How to install free Adobe Acrobat Reader
C. How to sign PDFs with your e-signature using free Adobe Acrobat Reader
D. How to sign PDFs with your Digital Certificate using free Adobe Acrobat Reader
How to download free Adobe Acrobat Reader
STEP 1: Go to https://get.adobe.com/reader/

STEP 2: Click "Download Acrobat Reader".
STEP 3: The installer will then be downloaded to your computer or laptop.
How to install free Adobe Acrobat Reader
STEP 1: In your computer or laptop, go to the Downloads folder, where the Adobe installer is saved. Then, double click the installer file.

STEP 2: The window for the installer will be displayed. Read and follow the instructions stated in the window to install Adobe Acrobat.
STEP 3: After following the steps, Adobe Acrobat will then be installed in your computer or laptop.
How to sign PDFs with your e-signature using free Adobe Acrobat Reader
STEP 1: In your computer or laptop, open the PDF you want to digitally sign using your free Adobe Acrobat desktop application.
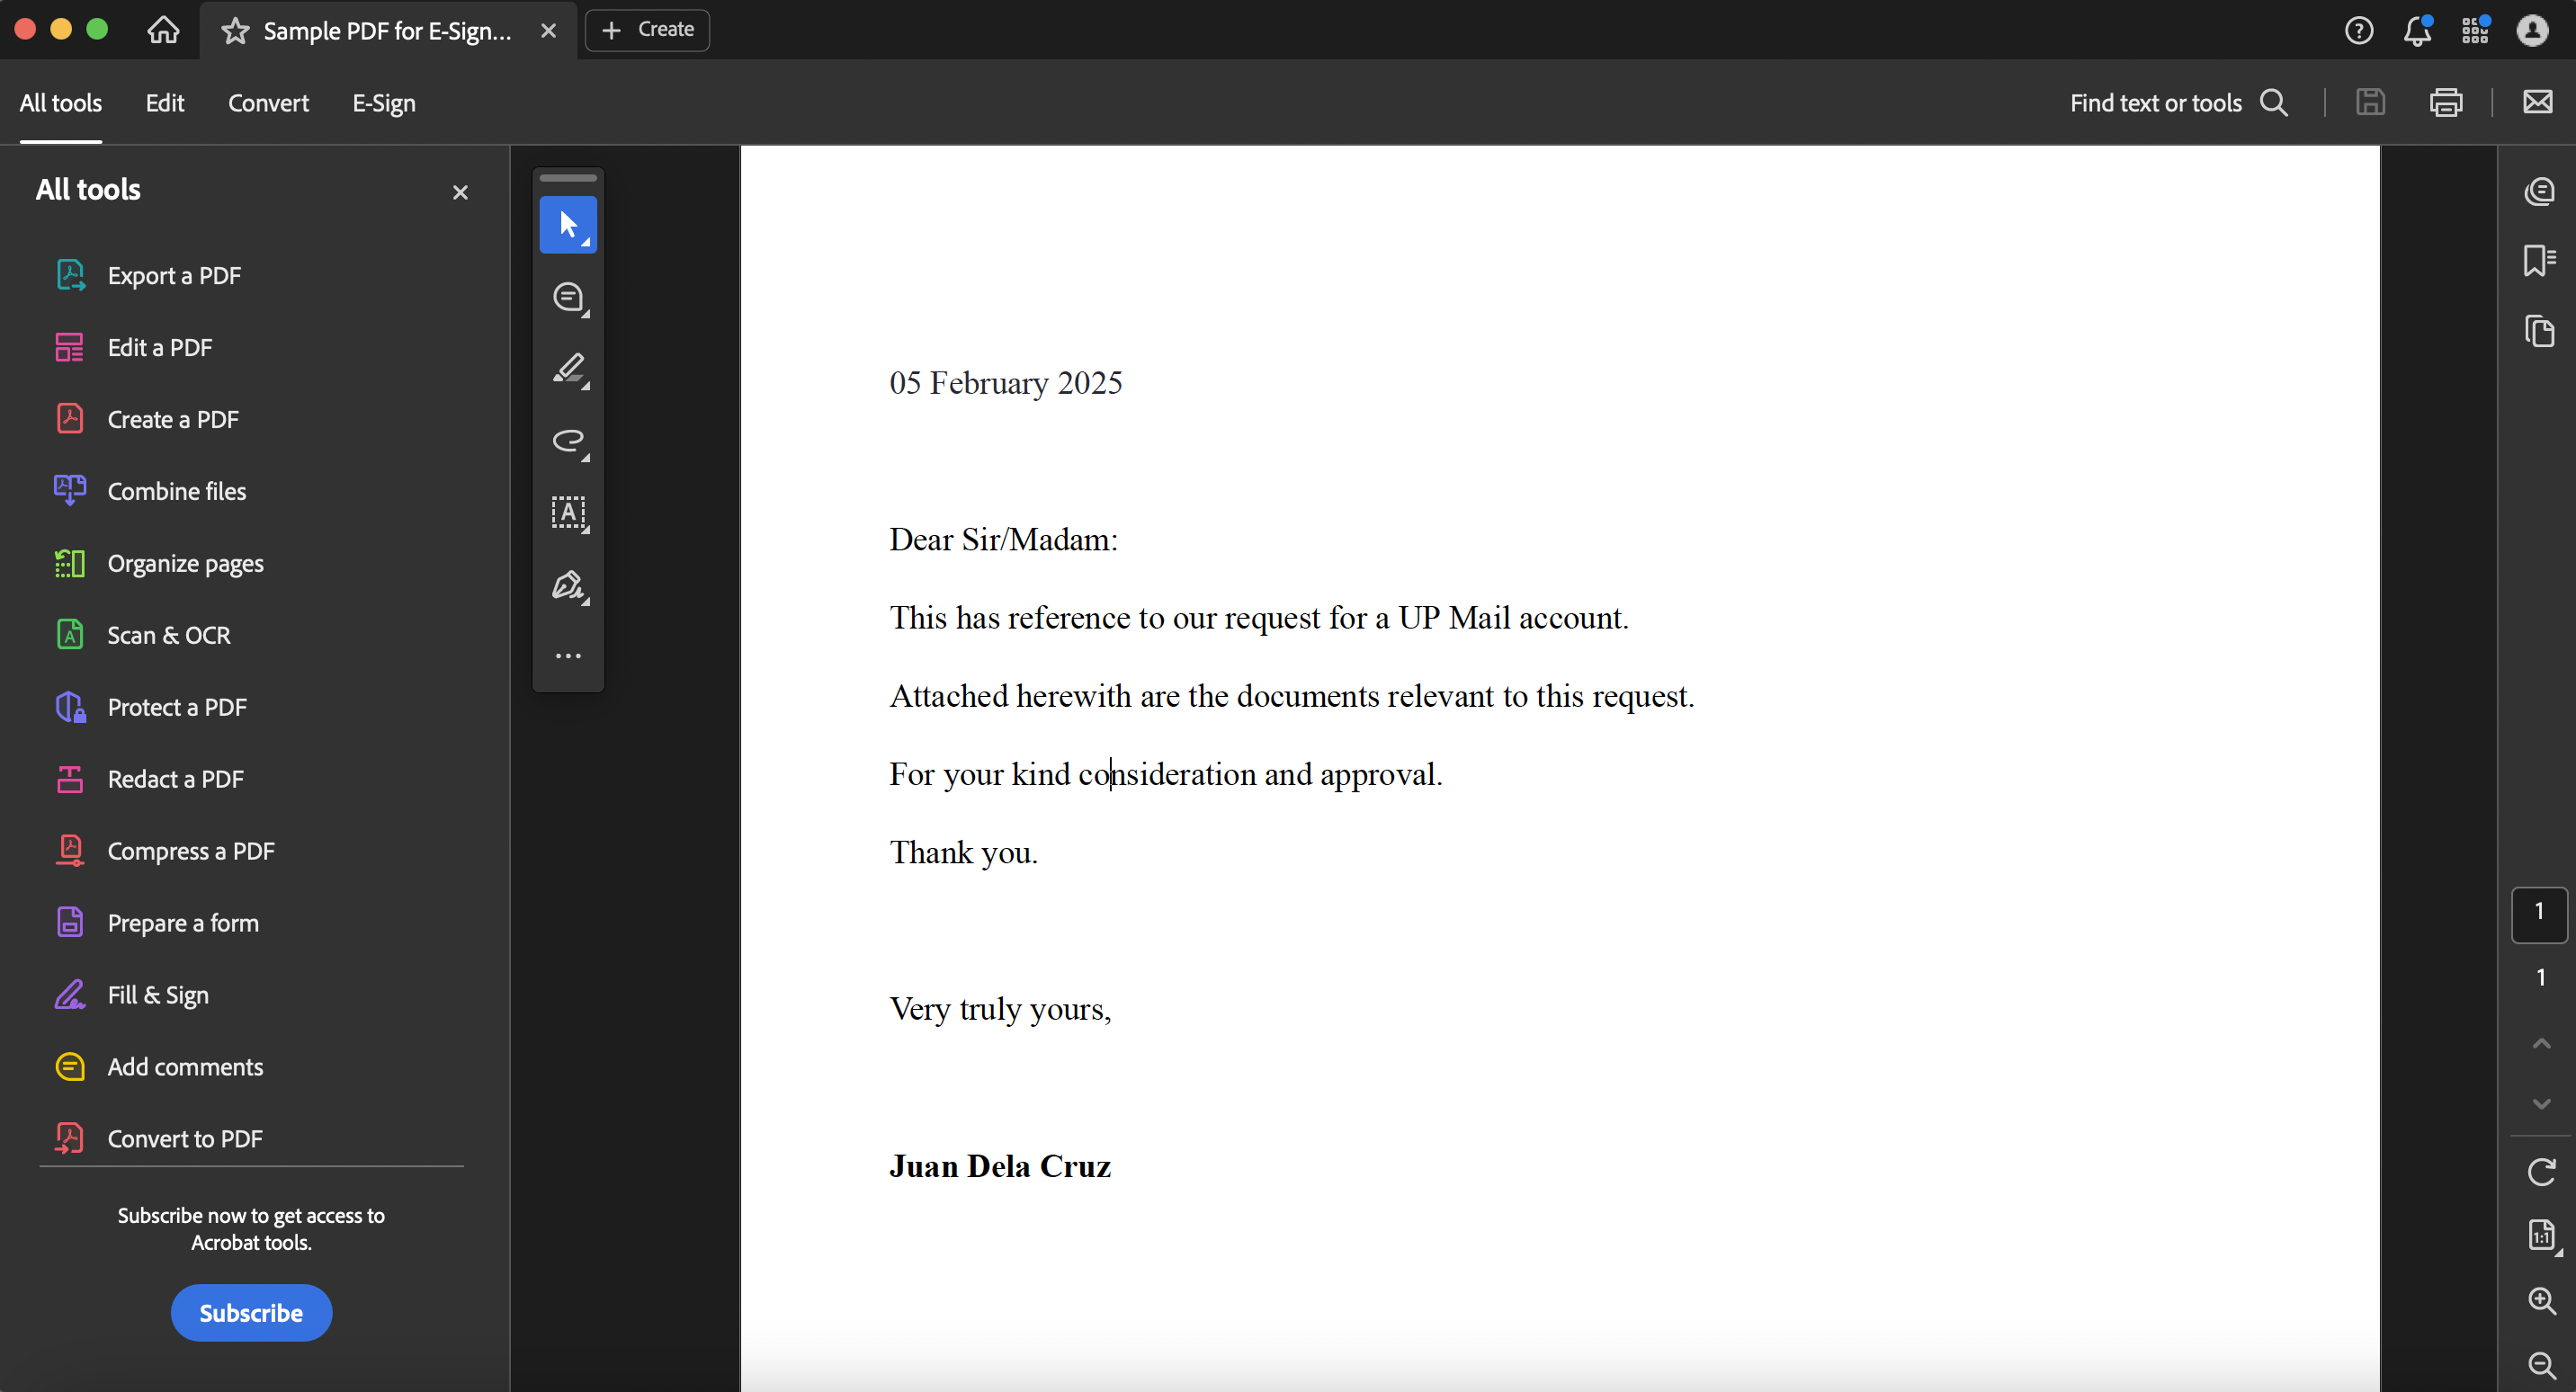
STEP 2: In the vertical tool bar, click the pen icon. Two options are available: Add Signature and Add Initials. To sign your PDF, click Add Signature.
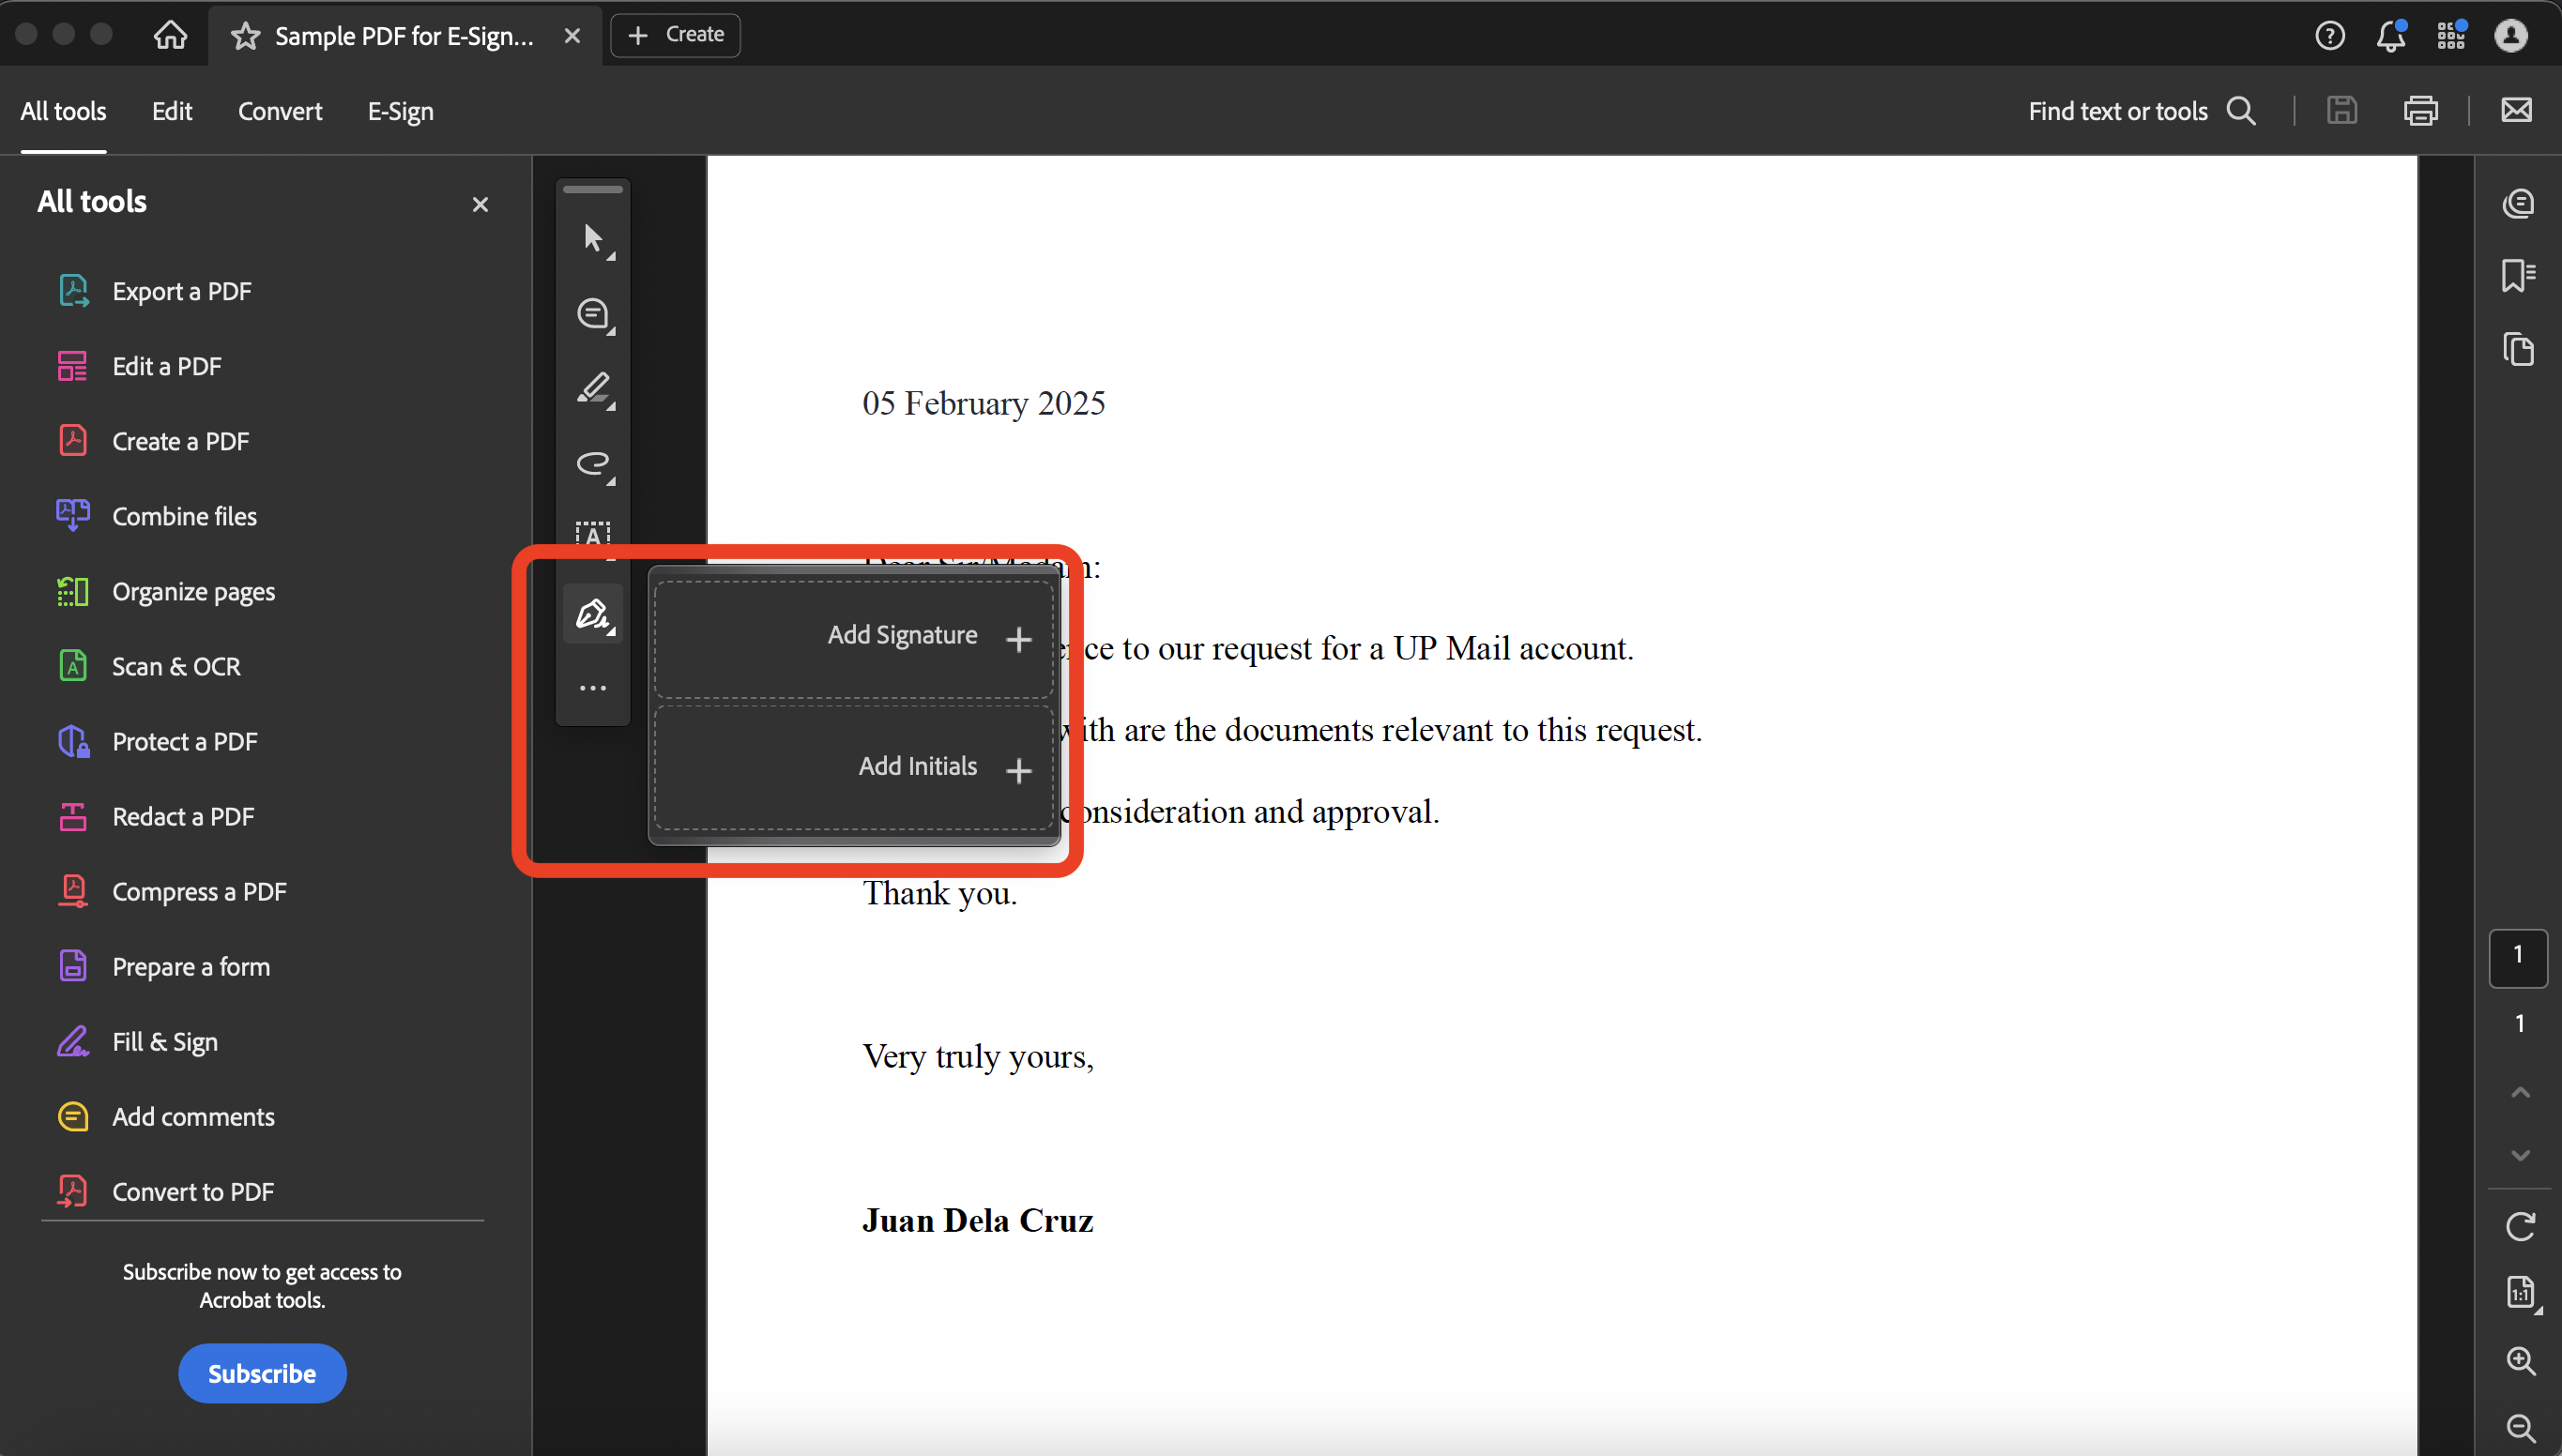
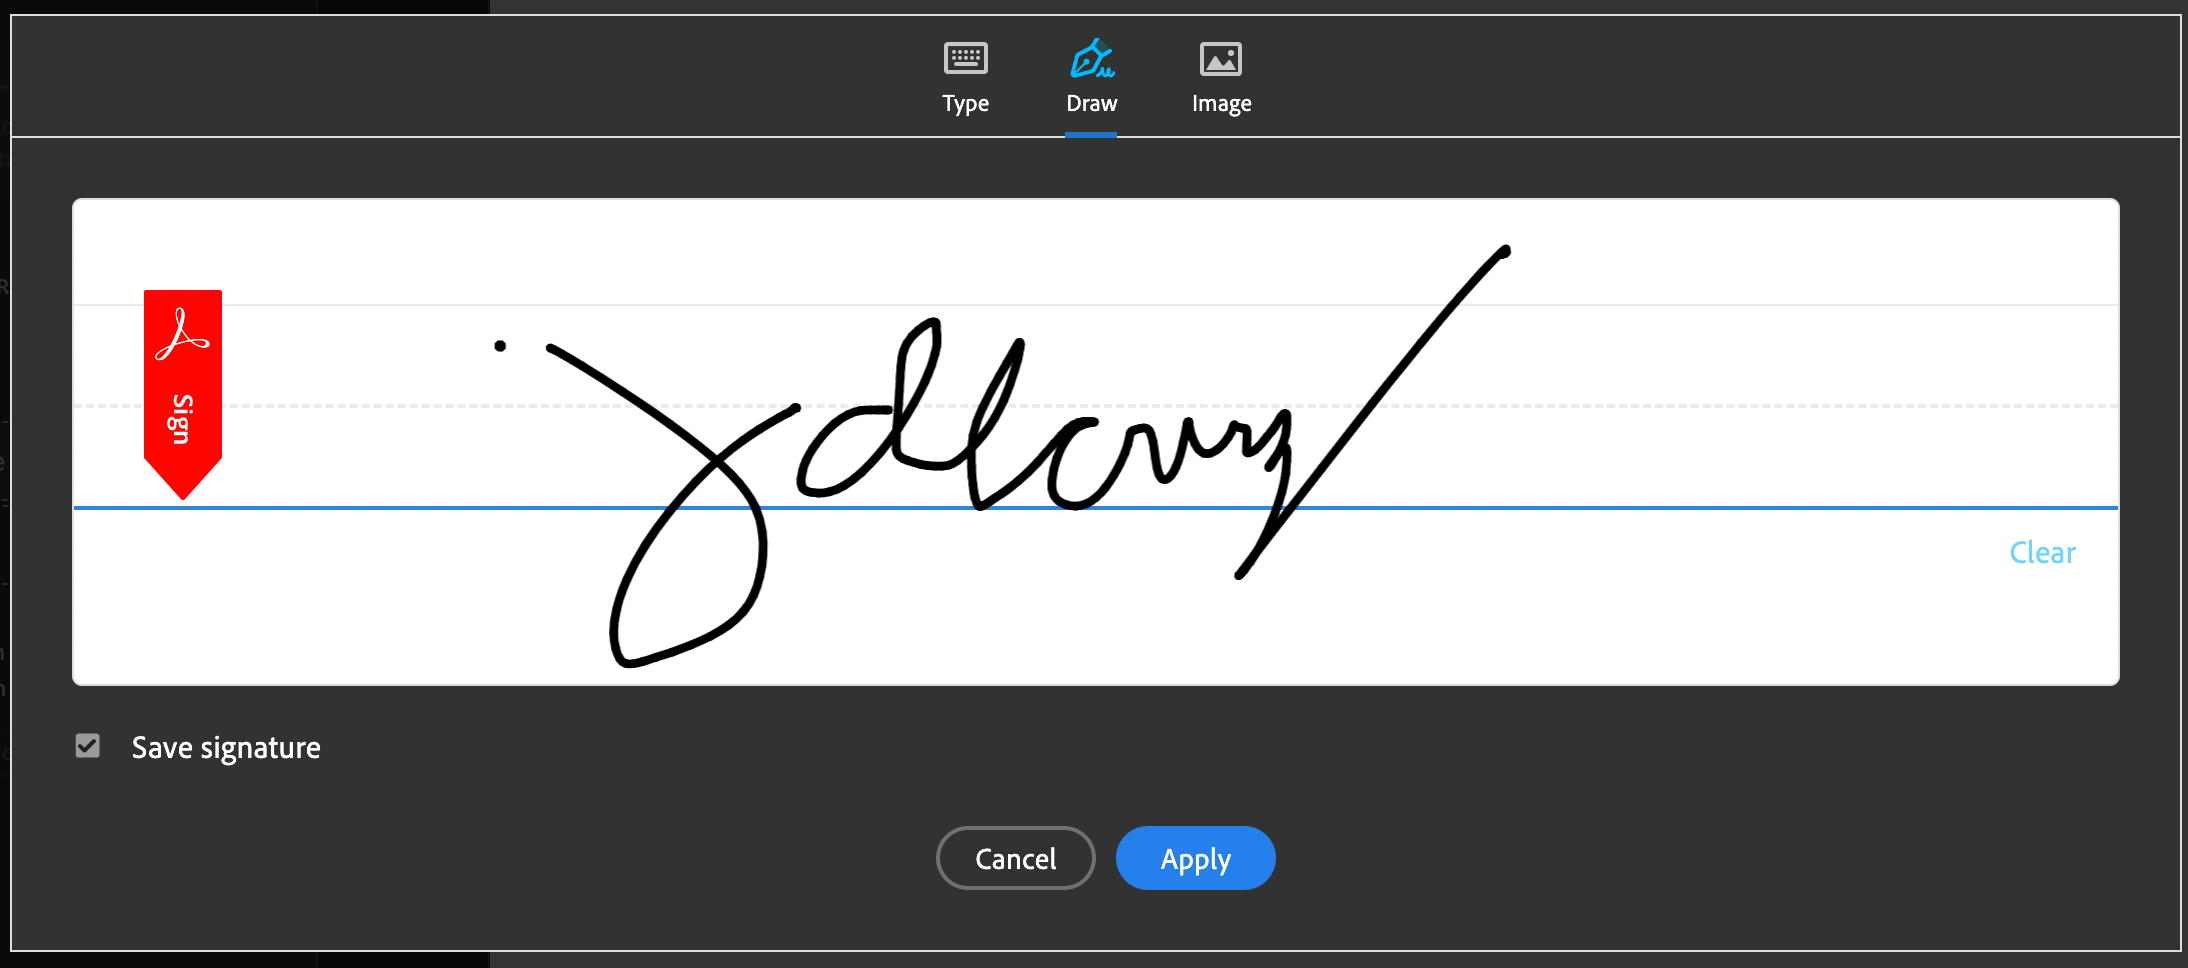
STEP 3: You can affix your signature by choosing among three (3) ways.
- Image of your signature: Click Image. The folders in your computer or laptop will then be opened. Look for the image of your e-signature that you want to affix in the document.
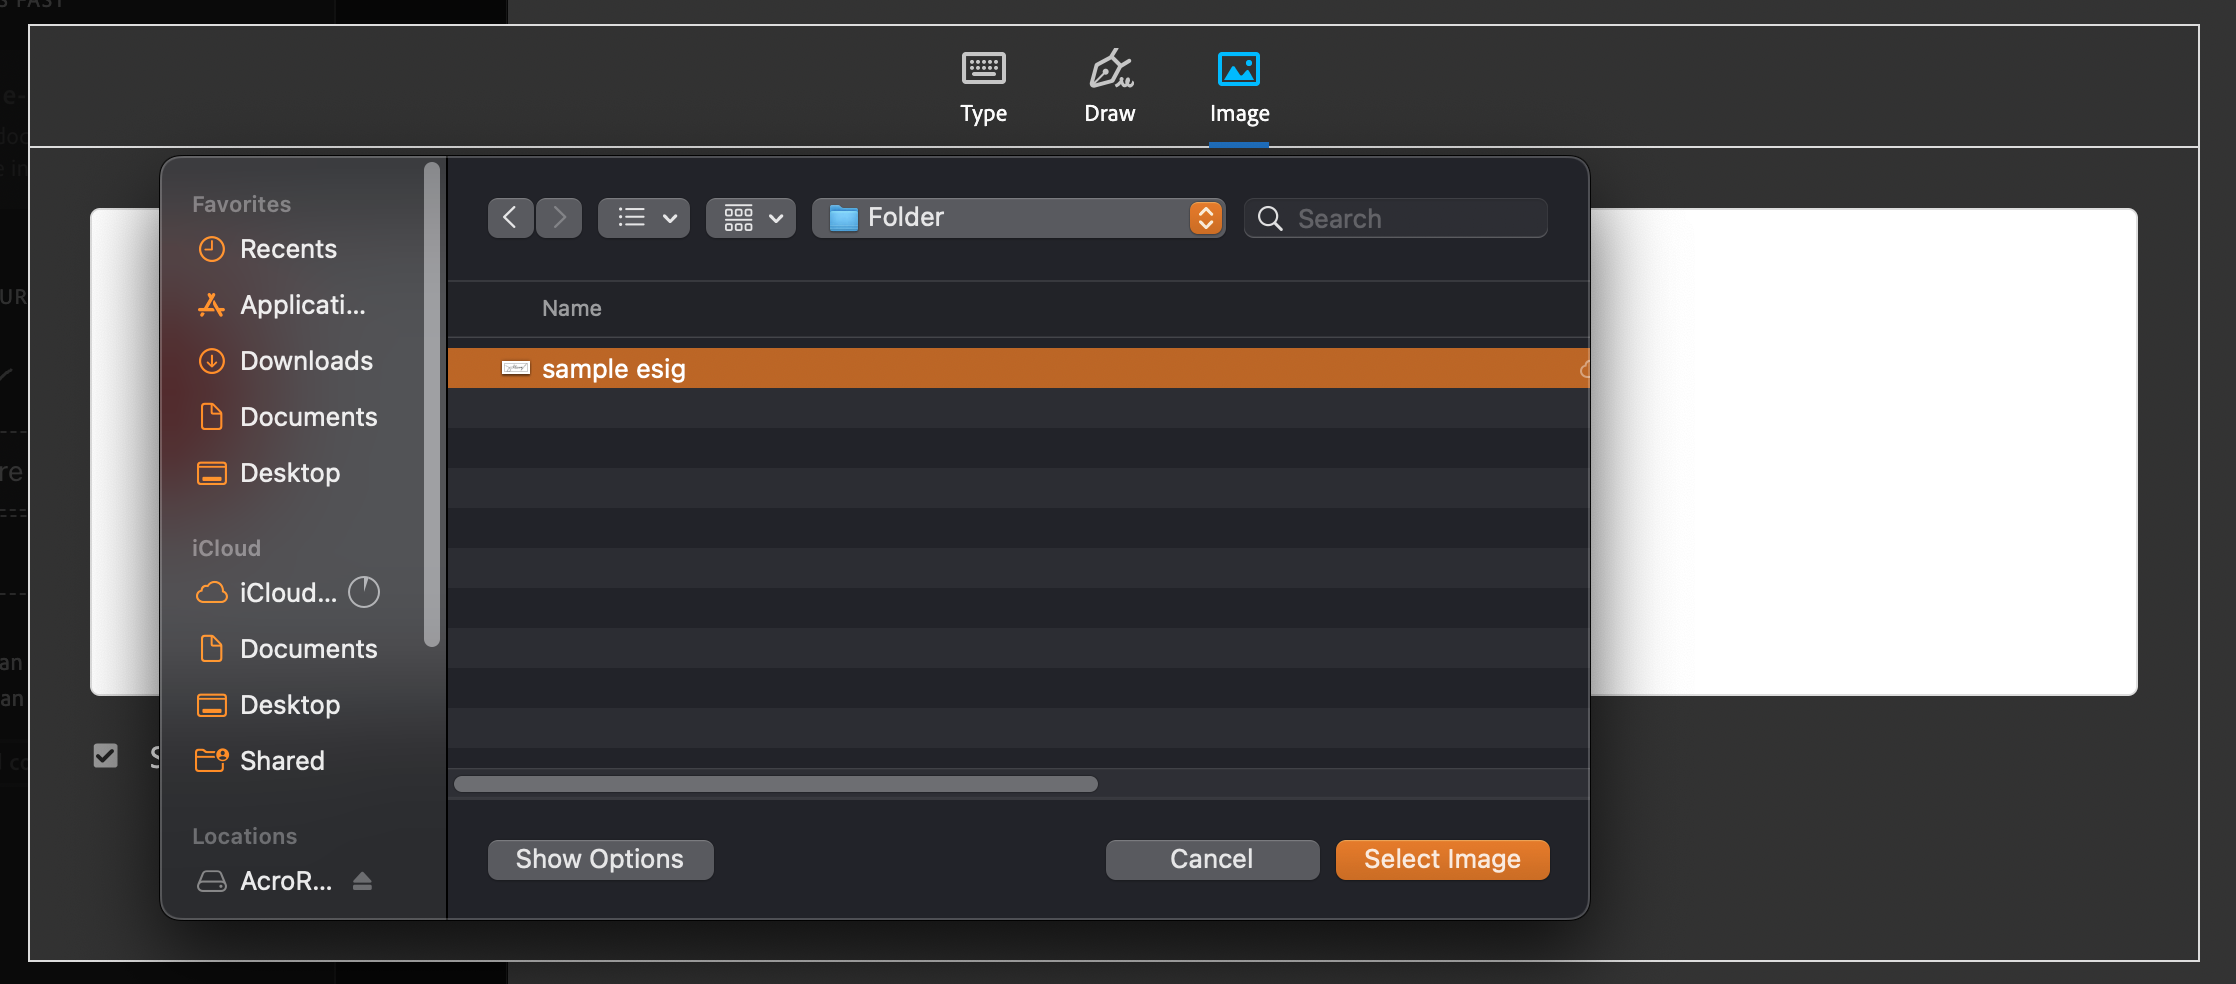
Select the image of your signature, then click Apply.

- Type your name: Type in your name using your keyboard. You can change the font style by clicking Change style on the lower right corner of the field. Then, click Apply.

- Draw your signature: You can draw your signature in the field. Then, click Apply.
STEP 4: Your signature will be on your cursor. Drag your cursor into the corresponding area/field where you want to affix your e-signature. Then, click to secure the signature in place.
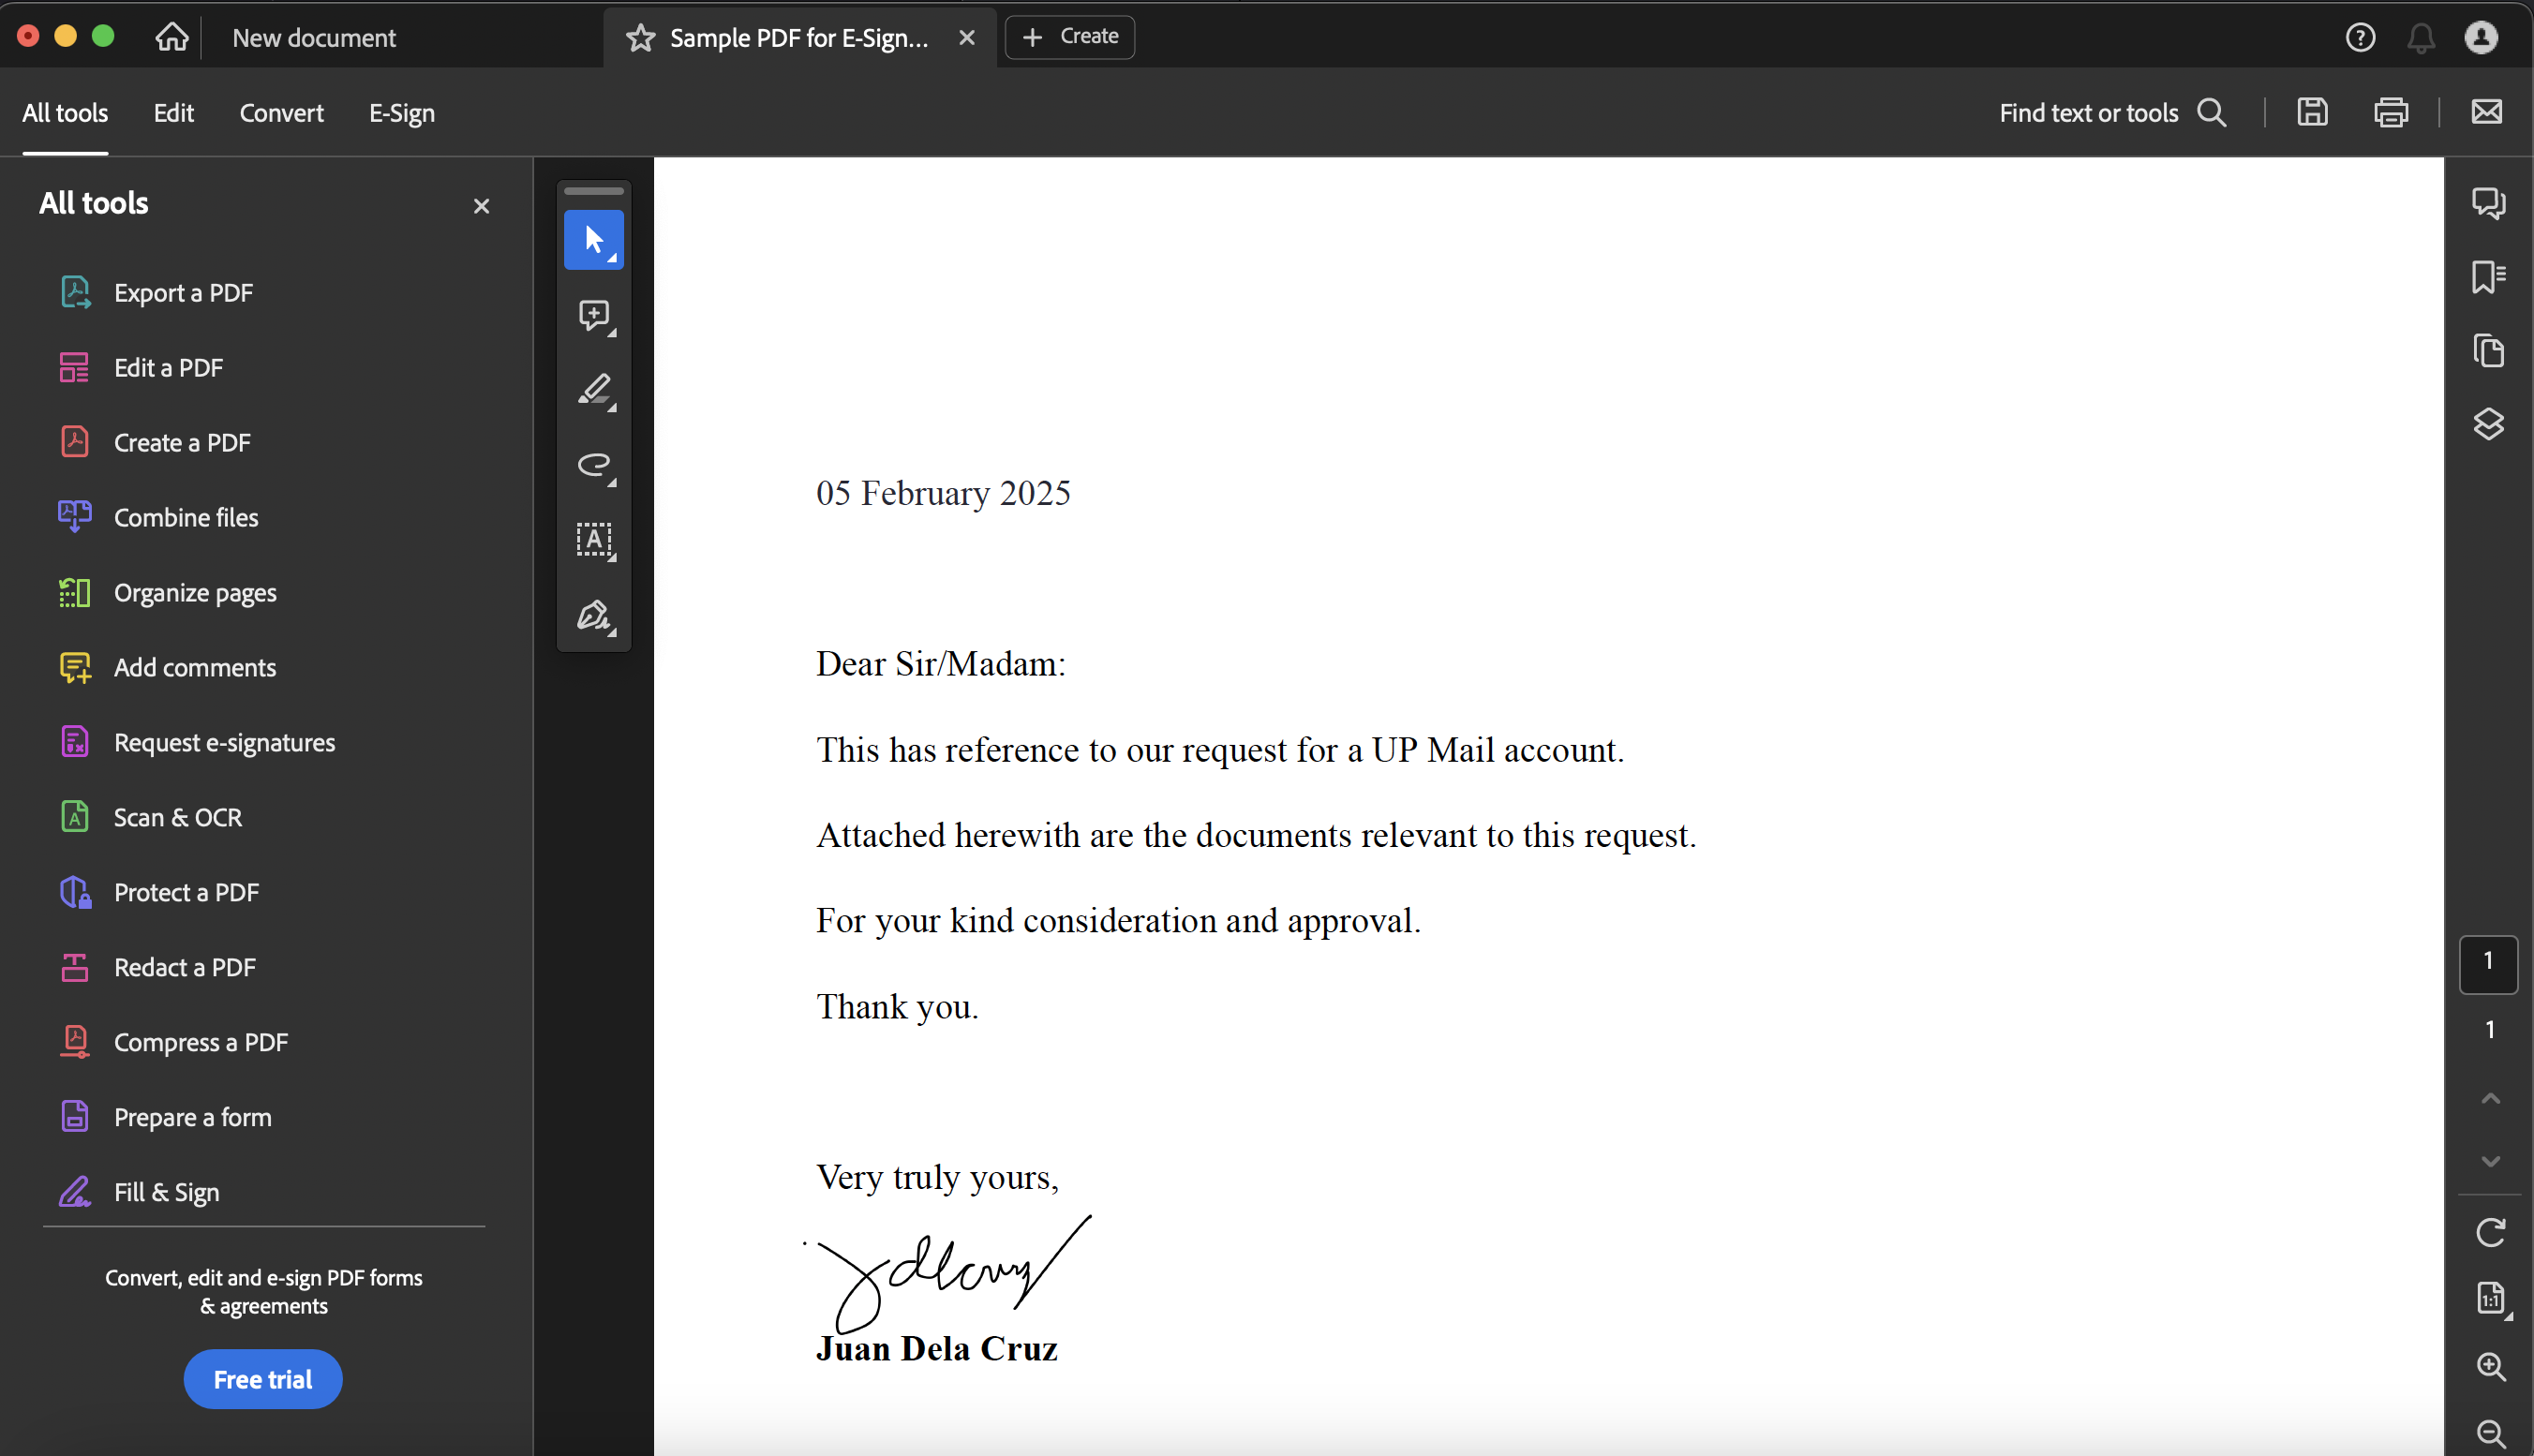
STEP 5: Once done, save your PDF with your signature.
How to sign PDFs with your Digital Certificate using free Adobe Acrobat Reader
NOTE: This is for users who already have their own digital certificate (e.g. PNPKI). These are optional steps.
The digital certificate shown in the steps below is for sample purposes only.
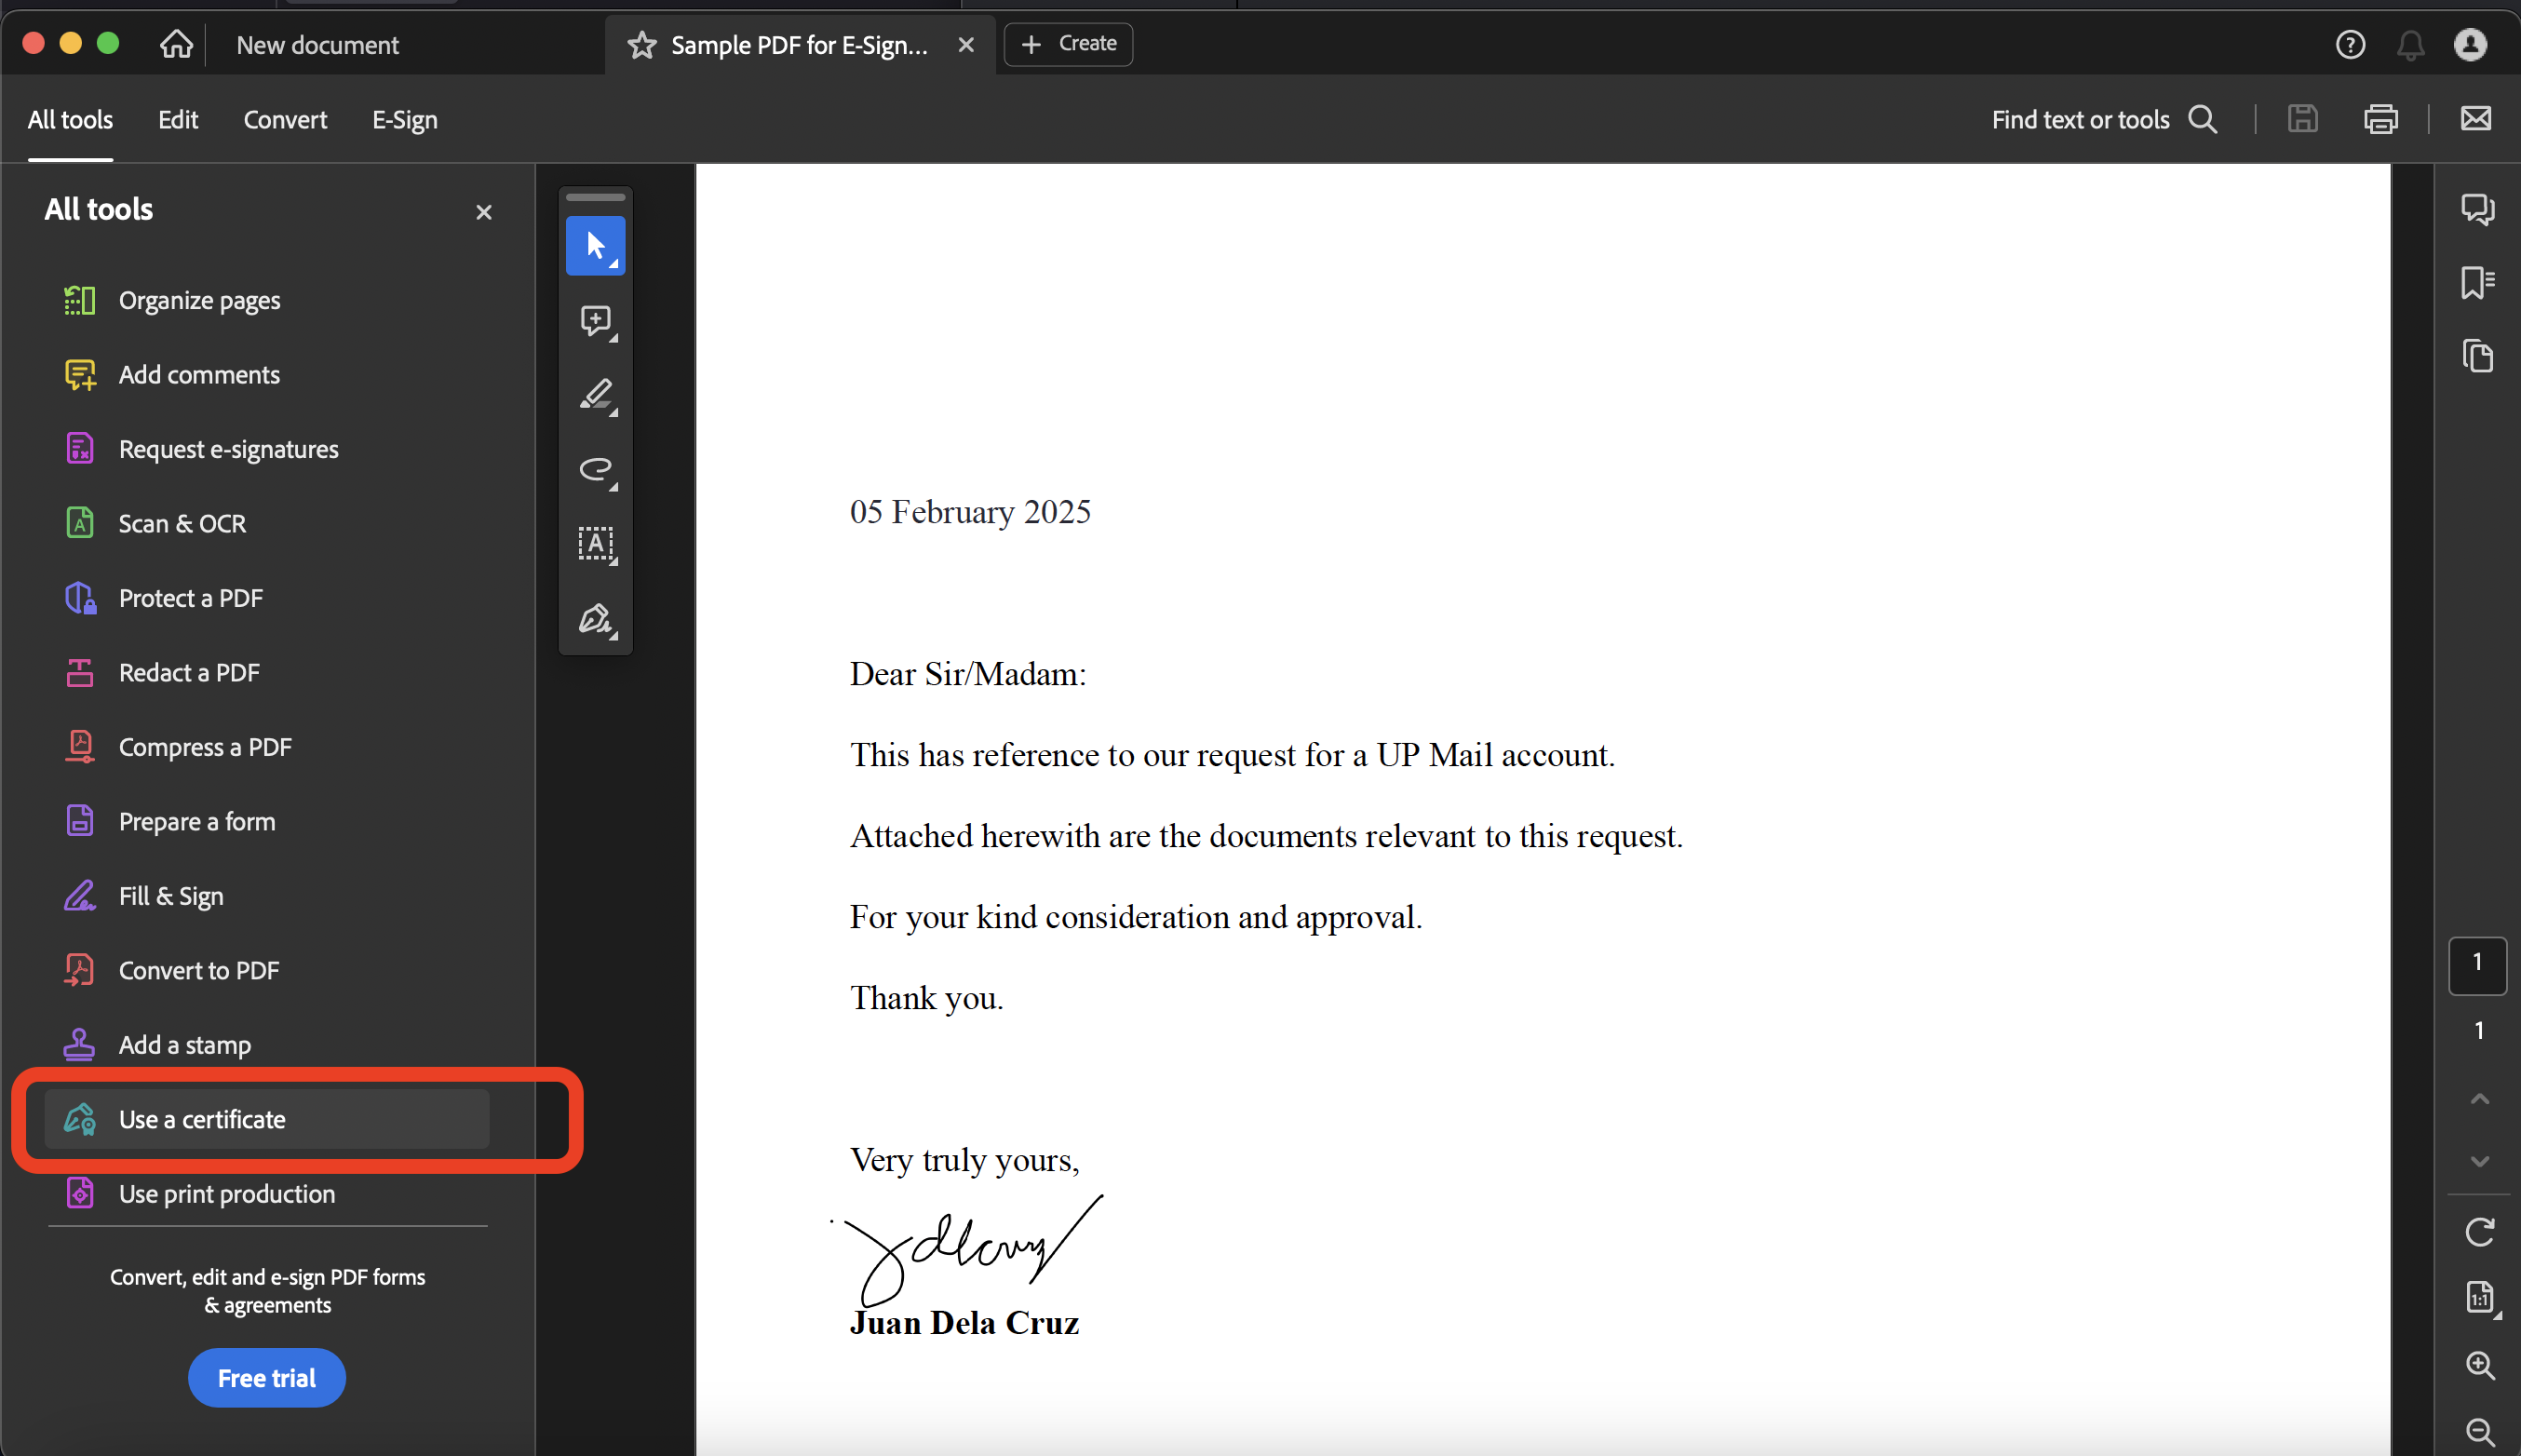
STEP 1: Open the PDF that you want to affix your digital certificate to using the free Adobe Acrobat Reader. On the left-side menu, look for the option to Use a certificate. Click this option.
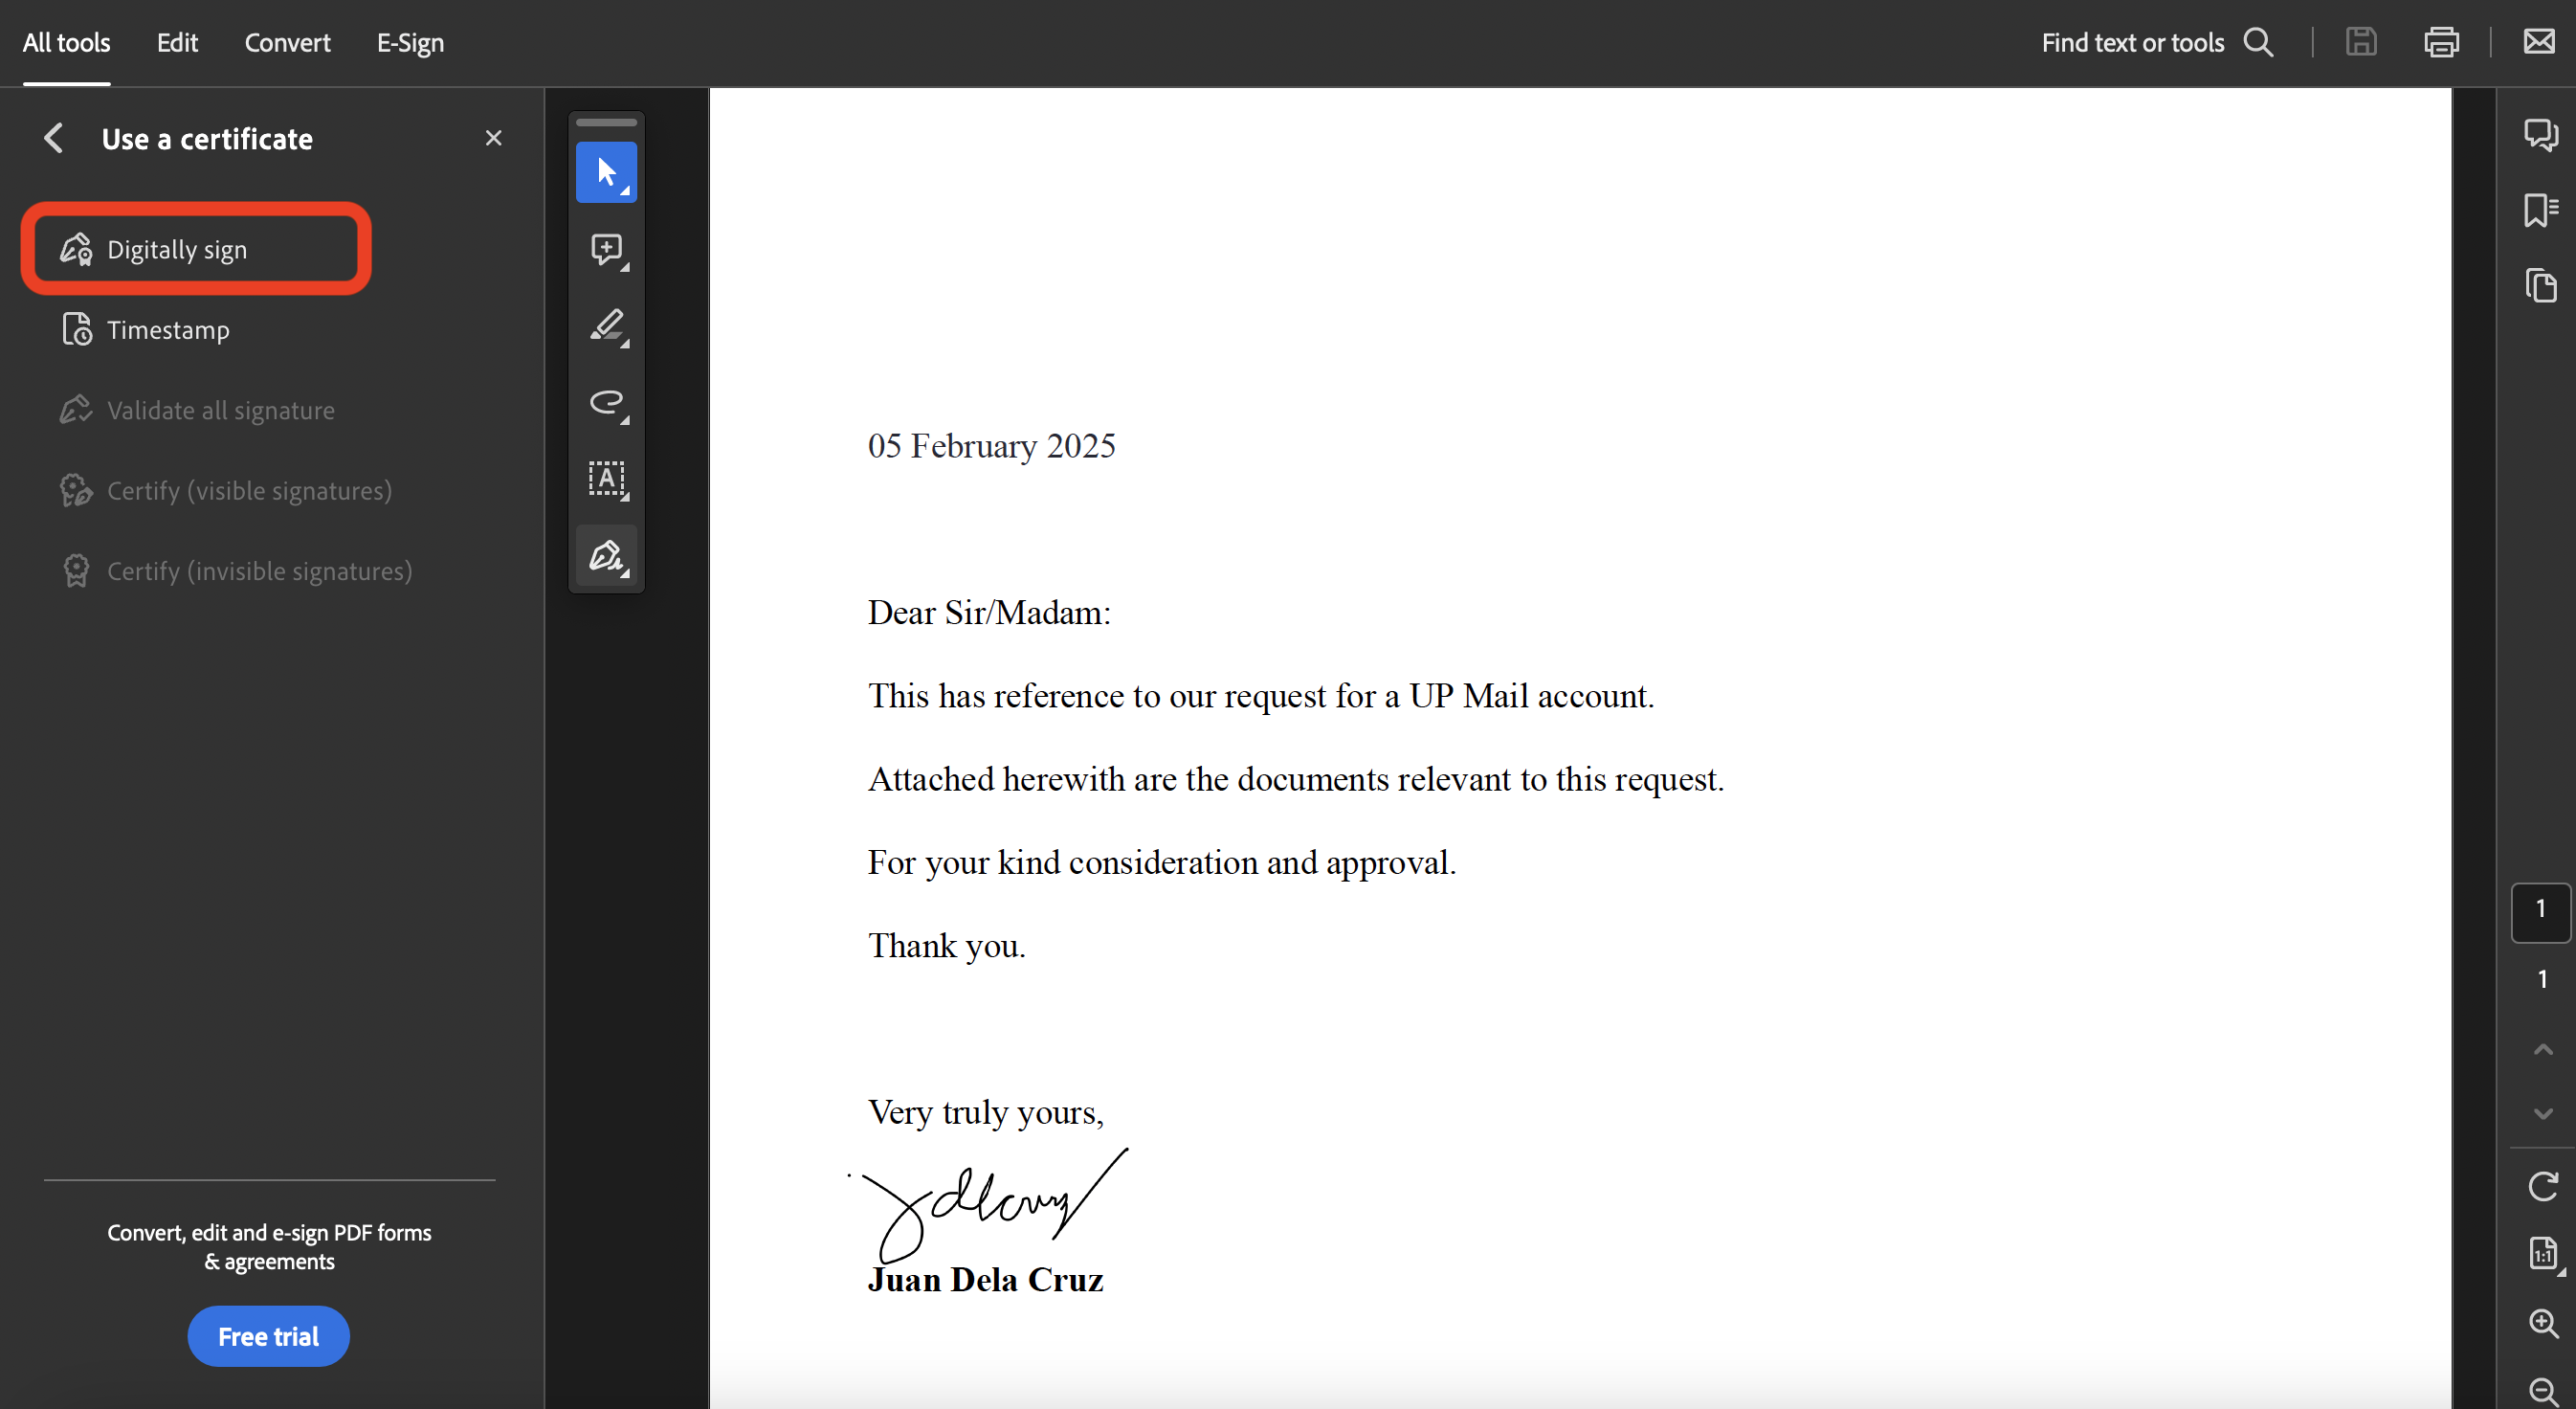
STEP 2: The next menu will be displayed. Click the option Digitally sign.
STEP 3: A prompt will appear with instructions for you to select the area where your digital certificate will be placed. Click OK, then select the area by clicking and dragging using your mouse.

STEP 4: A prompt will appear, stating that you need to configure a digital ID. Click the button for Configure Digital ID.

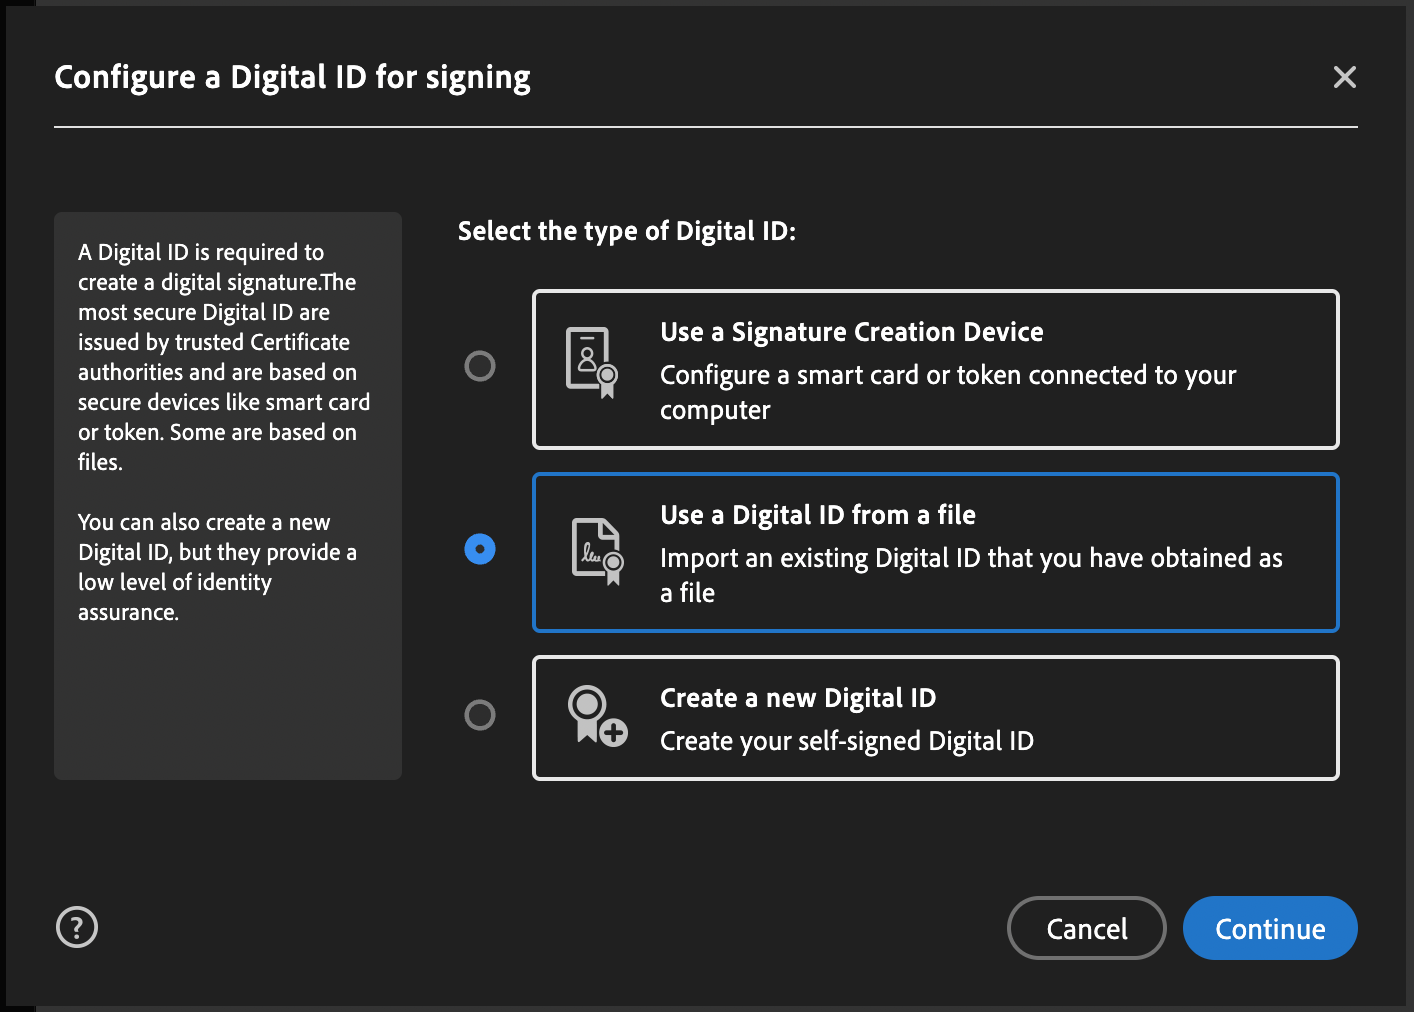
STEP 5: A window will appear where you can select the type of digital ID. If you already have your own digital certificate (e.g. PNPKI), you can select the option to Use a Digital ID from a file to configure your digital certificate within your Adobe Acrobat application. Then, click Continue.
STEP 6: A window will appear for you to select/browse and upload the file of your digital certificate. Click Browse and then select the file saved in your computer. (NOTE: Make sure that you know the password of your own digital certificate, as Adobe Acrobat Reader will require you to enter it.)

STEP 7: The next window will display your digital certificate that will be affixed to the document. Click Continue.

STEP 8: In the next window, select your digital certificate file, then click Continue.

STEP 9: You will then see a preview of your digital certificate. Enter the password of your digital ID once again. Then, click the Sign button.

STEP 10: Your digital certificate will then be affixed to your document. Make sure to save your PDF.


